In this article, we’ll look at connecting the Mysql database, executing queries, and getting / processing the result.
I will use NetBeans to work on the project.
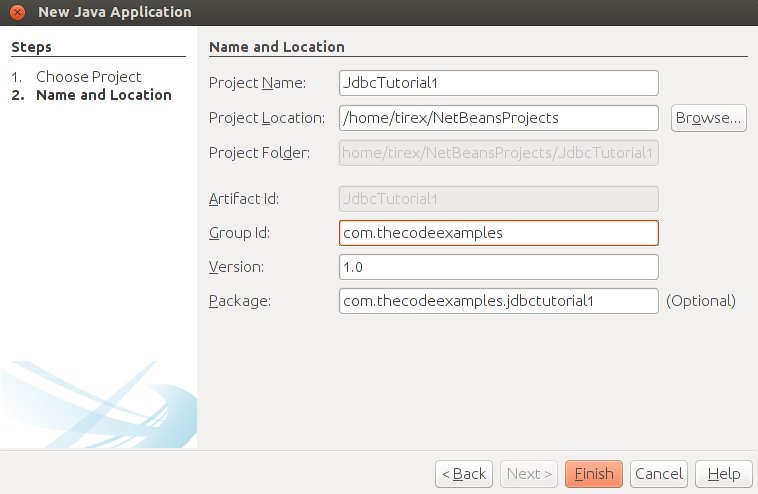
Creating a project
Let’s create bare maven project.
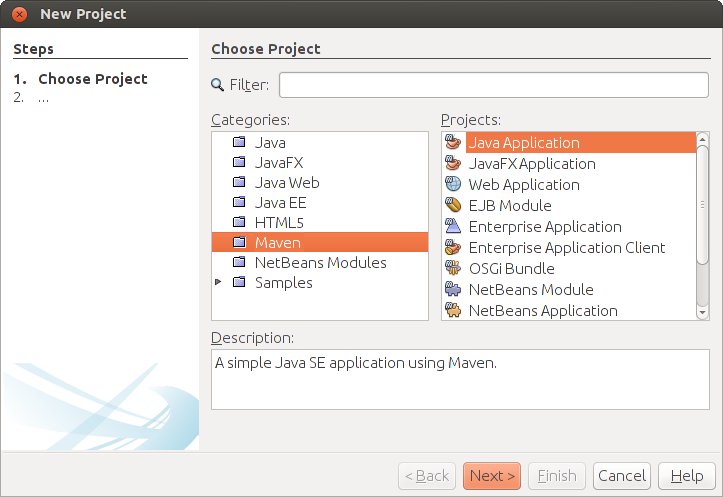
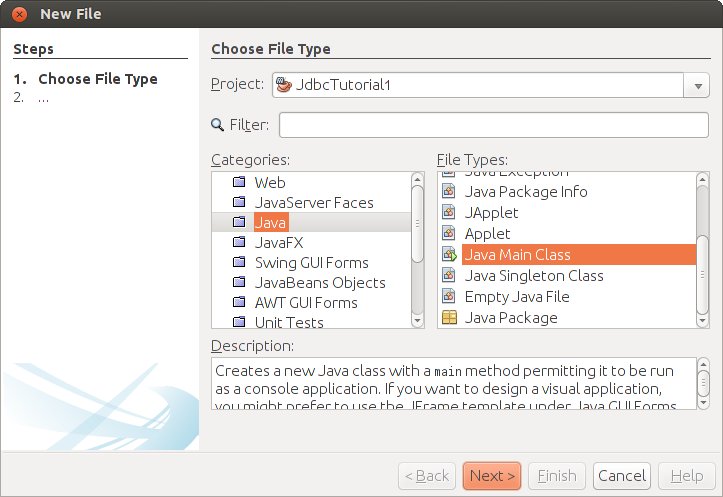
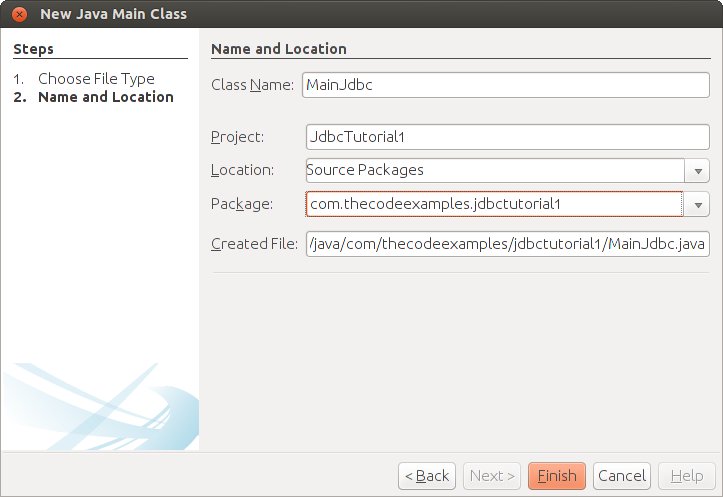
Create the Main project class.
Select in Netbeans menu File > New file (CTRL-N)
Project dependencies
Now we need to add dependency jdbc driver.
Current version of connector for java at the moment 5.1.42
Add the following code to pom.xml
|
1 2 3 4 5 6 7 8 9 |
<dependencies> ... <dependency> <groupId>mysql</groupId> <artifactId>mysql-connector-java</artifactId> <version>5.1.42</version> </dependency> ... </dependencies> |
Working with jdbc
Work with the database can be divided into five simple steps
Establishing a Connection.
1. First, you need to establish a connection with the database you want to use. You must manually load any JDBC drivers if you work with version before 4.0.
|
1 2 3 |
Connection connection = DriverManager.getConnection( "jdbc:mysql://localhost:3306/thecodeexamples", "db", "password"); |
2. Create a statement.
|
1 |
Statement stmt = connection.createStatement(); |
3. Execute the query.
|
1 |
ResultSet rs = stmt.executeQuery("SELECT id, name FROM students"); |
4. Process the recordset
After the query is executed, we get the ResultSet object to be processed to retrieve the data.
|
1 2 3 4 5 |
while (rs.next()) { int id = rs.getInt("id"); String name = rs.getString("name"); System.out.println(String.format("Student id=%d name=%s", id, name)); } |
5. Close the connection.
Be sure to close the connection to the database after the end of the work, otherwise there may be a memory leak in your application.
|
1 |
connection.close(); |
Final project:
|
1 2 3 4 5 6 7 8 9 10 11 12 13 14 15 16 17 18 19 20 21 22 23 24 25 26 27 28 29 30 31 32 33 34 35 36 37 38 39 40 41 42 |
package com.thecodeexamples.jdbctutorial1; import java.sql.Connection; import java.sql.DriverManager; import java.sql.ResultSet; import java.sql.SQLException; import java.sql.Statement; public class MainJdbc { public static void main(String[] args) { try { Connection connection = getMysqlConnection(); Statement stmt = connection.createStatement(); ResultSet rs = stmt.executeQuery("SELECT id, name FROM students"); while (rs.next()) { int id = rs.getInt("id"); String name = rs.getString("name"); System.out.println(String.format("Student id=%d name=%s", id, name)); } connection.close(); } catch (SQLException ex) { ex.printStackTrace(); } } public static Connection getMysqlConnection() throws SQLException { Connection connection; try { connection = DriverManager.getConnection( "jdbc:mysql://localhost:3306/thecodeexamples", "db", "password"); } catch (SQLException ex) { System.out.println("Connection Failed!"); ex.printStackTrace(); throw ex; } return connection; } } |
Console output:
|
1 2 3 |
Student id=1 name=John Student id=2 name=Iren Student id=3 name=George |